Instant dosa for Dosa lovers!
Some mornings can be lazy driven when you just want to schedule out the breakfast with a quick fix. Dosa being a popular South Indian crepe is mostly made with fermented rice and lentils. Today I am sharing a variation of our traditional dosa recipe. The Instant Carrot Dosa is an ideal way to start your day.
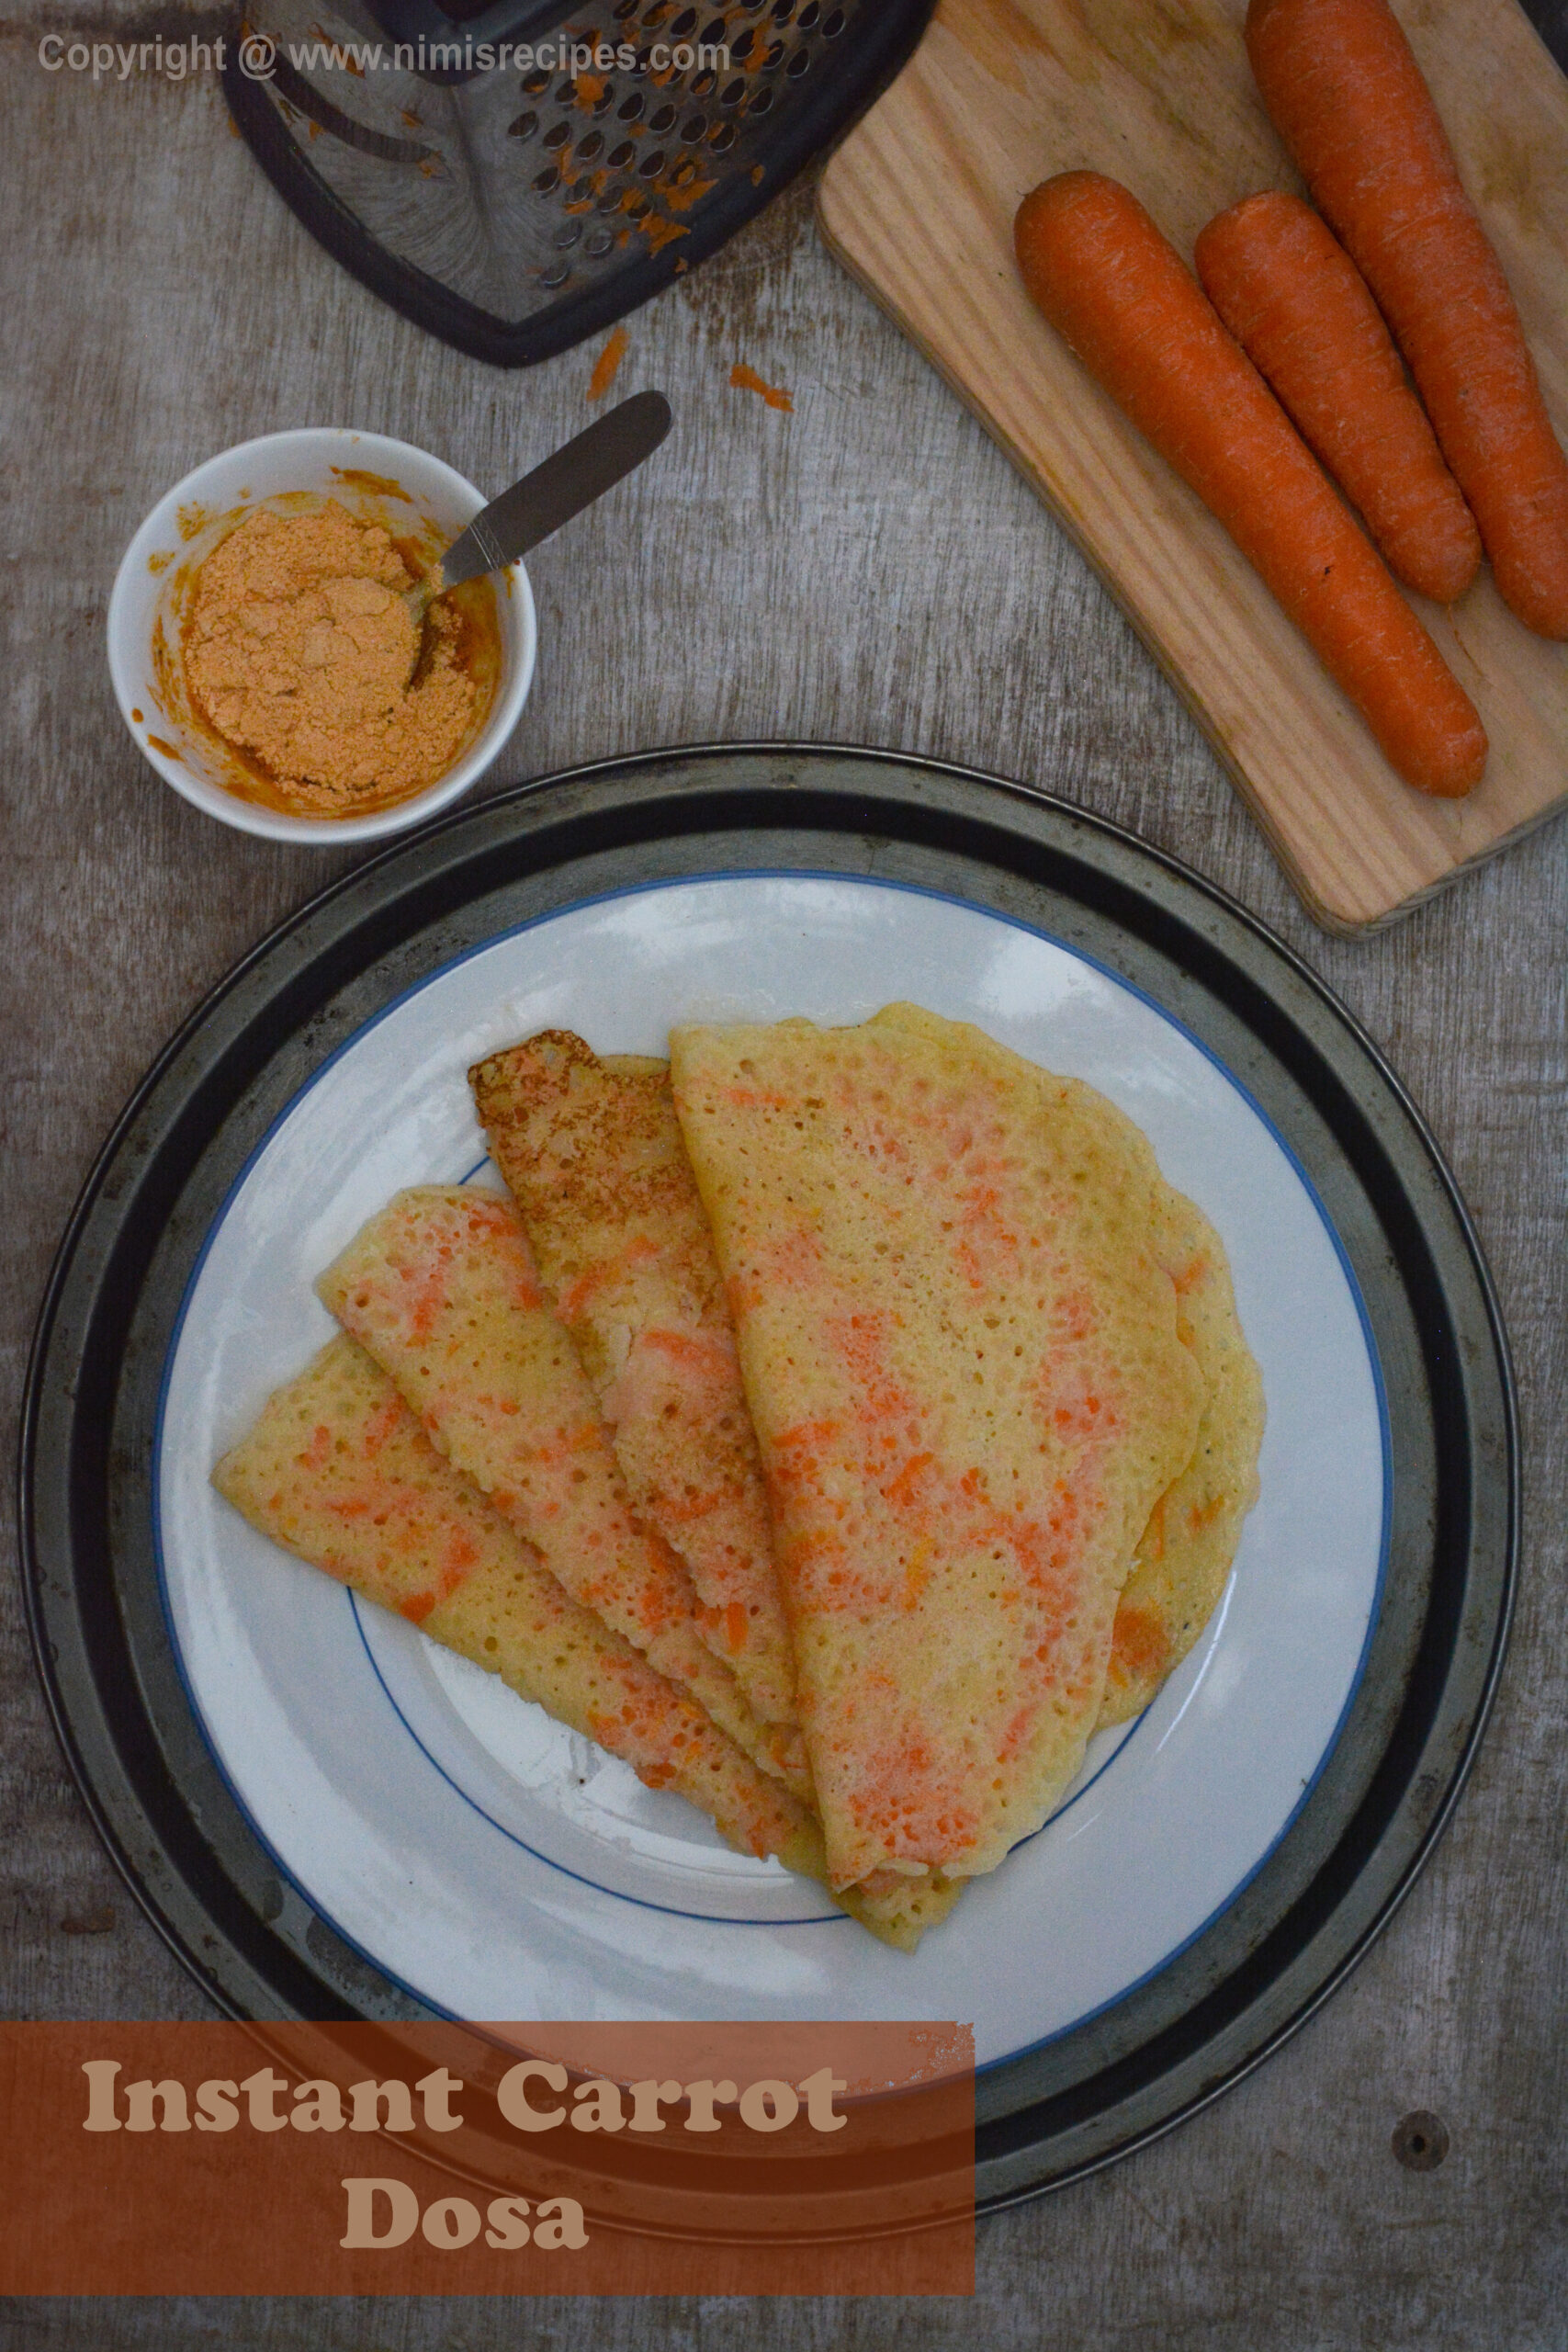
Looking for a fuss-free breakfast idea? The Instant Carrot Dosa is an ideal way to start your day. This dosa is colorful, healthy, and needs no overnight preparation. Made with carrots and rice, this dosa is delicious and will be a delight for your tastebuds.
Carrot Dosa
Ingredients:
1 cup of cooked rice
1 cup of raw rice
1 cup of grated carrots
3 tbsp of sugar
Half a cup of thick coconut milk
Half a cup of water
Salt to taste
Instructions:
Wash the rice and soak for 10 mins.
Add cooked rice and grind with water.
Let the mixture grind into a smooth paste.
Add grated carrots, sugar, coconut milk, and salt.
Mix all the ingredients well into a batter of pouring consistency.
Heat a Tawa and pour batter on it.
Cook dosas with ghee.
Serve hot with any chutney.
I relish this dosa with chutney podi mixed with sesame oil. You can also serve them with Sambar and coconut chutney. If you wish to learn to make the gunpowder chutney or chutney podi click below on the link .
Do try this at home and please leave your comments and suggestions in the comments section below.

A homemaker who fell head over heels in love with food -an award-winning cookbook author, food blogger, award-winning culinary demonstrator
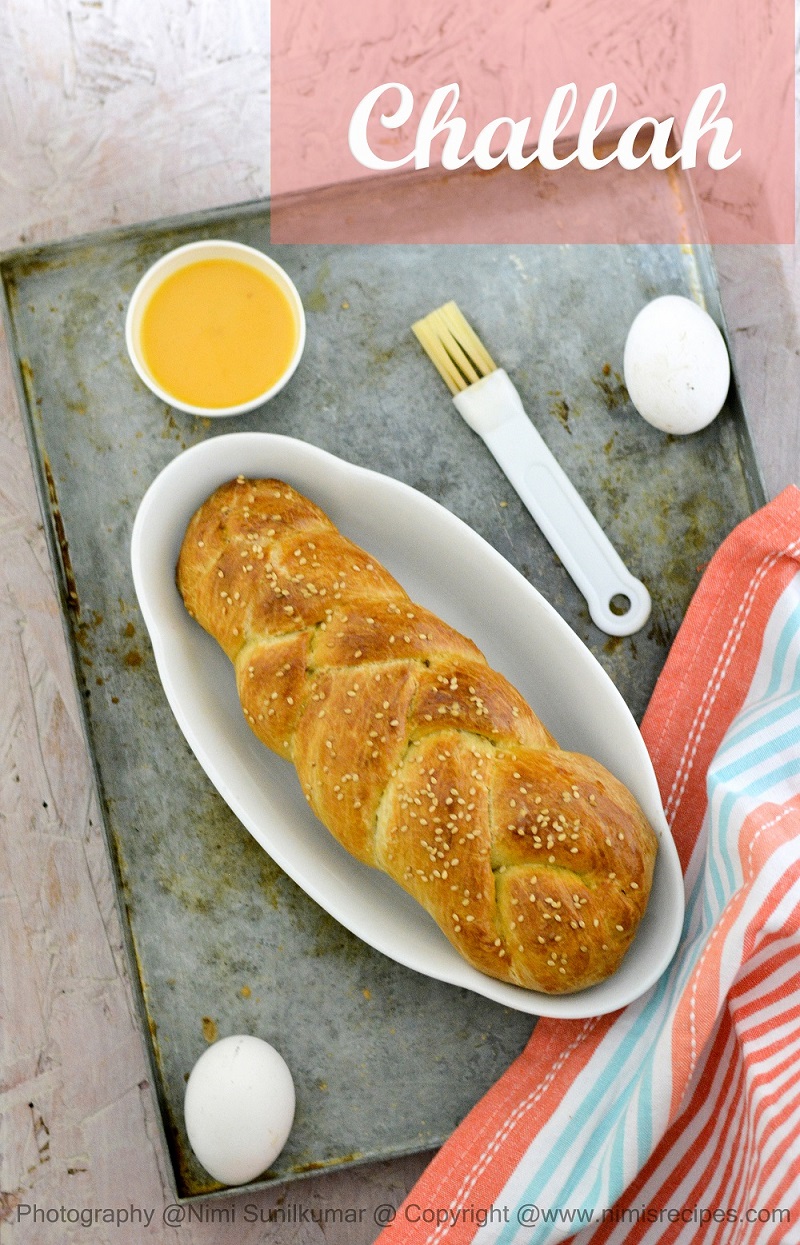
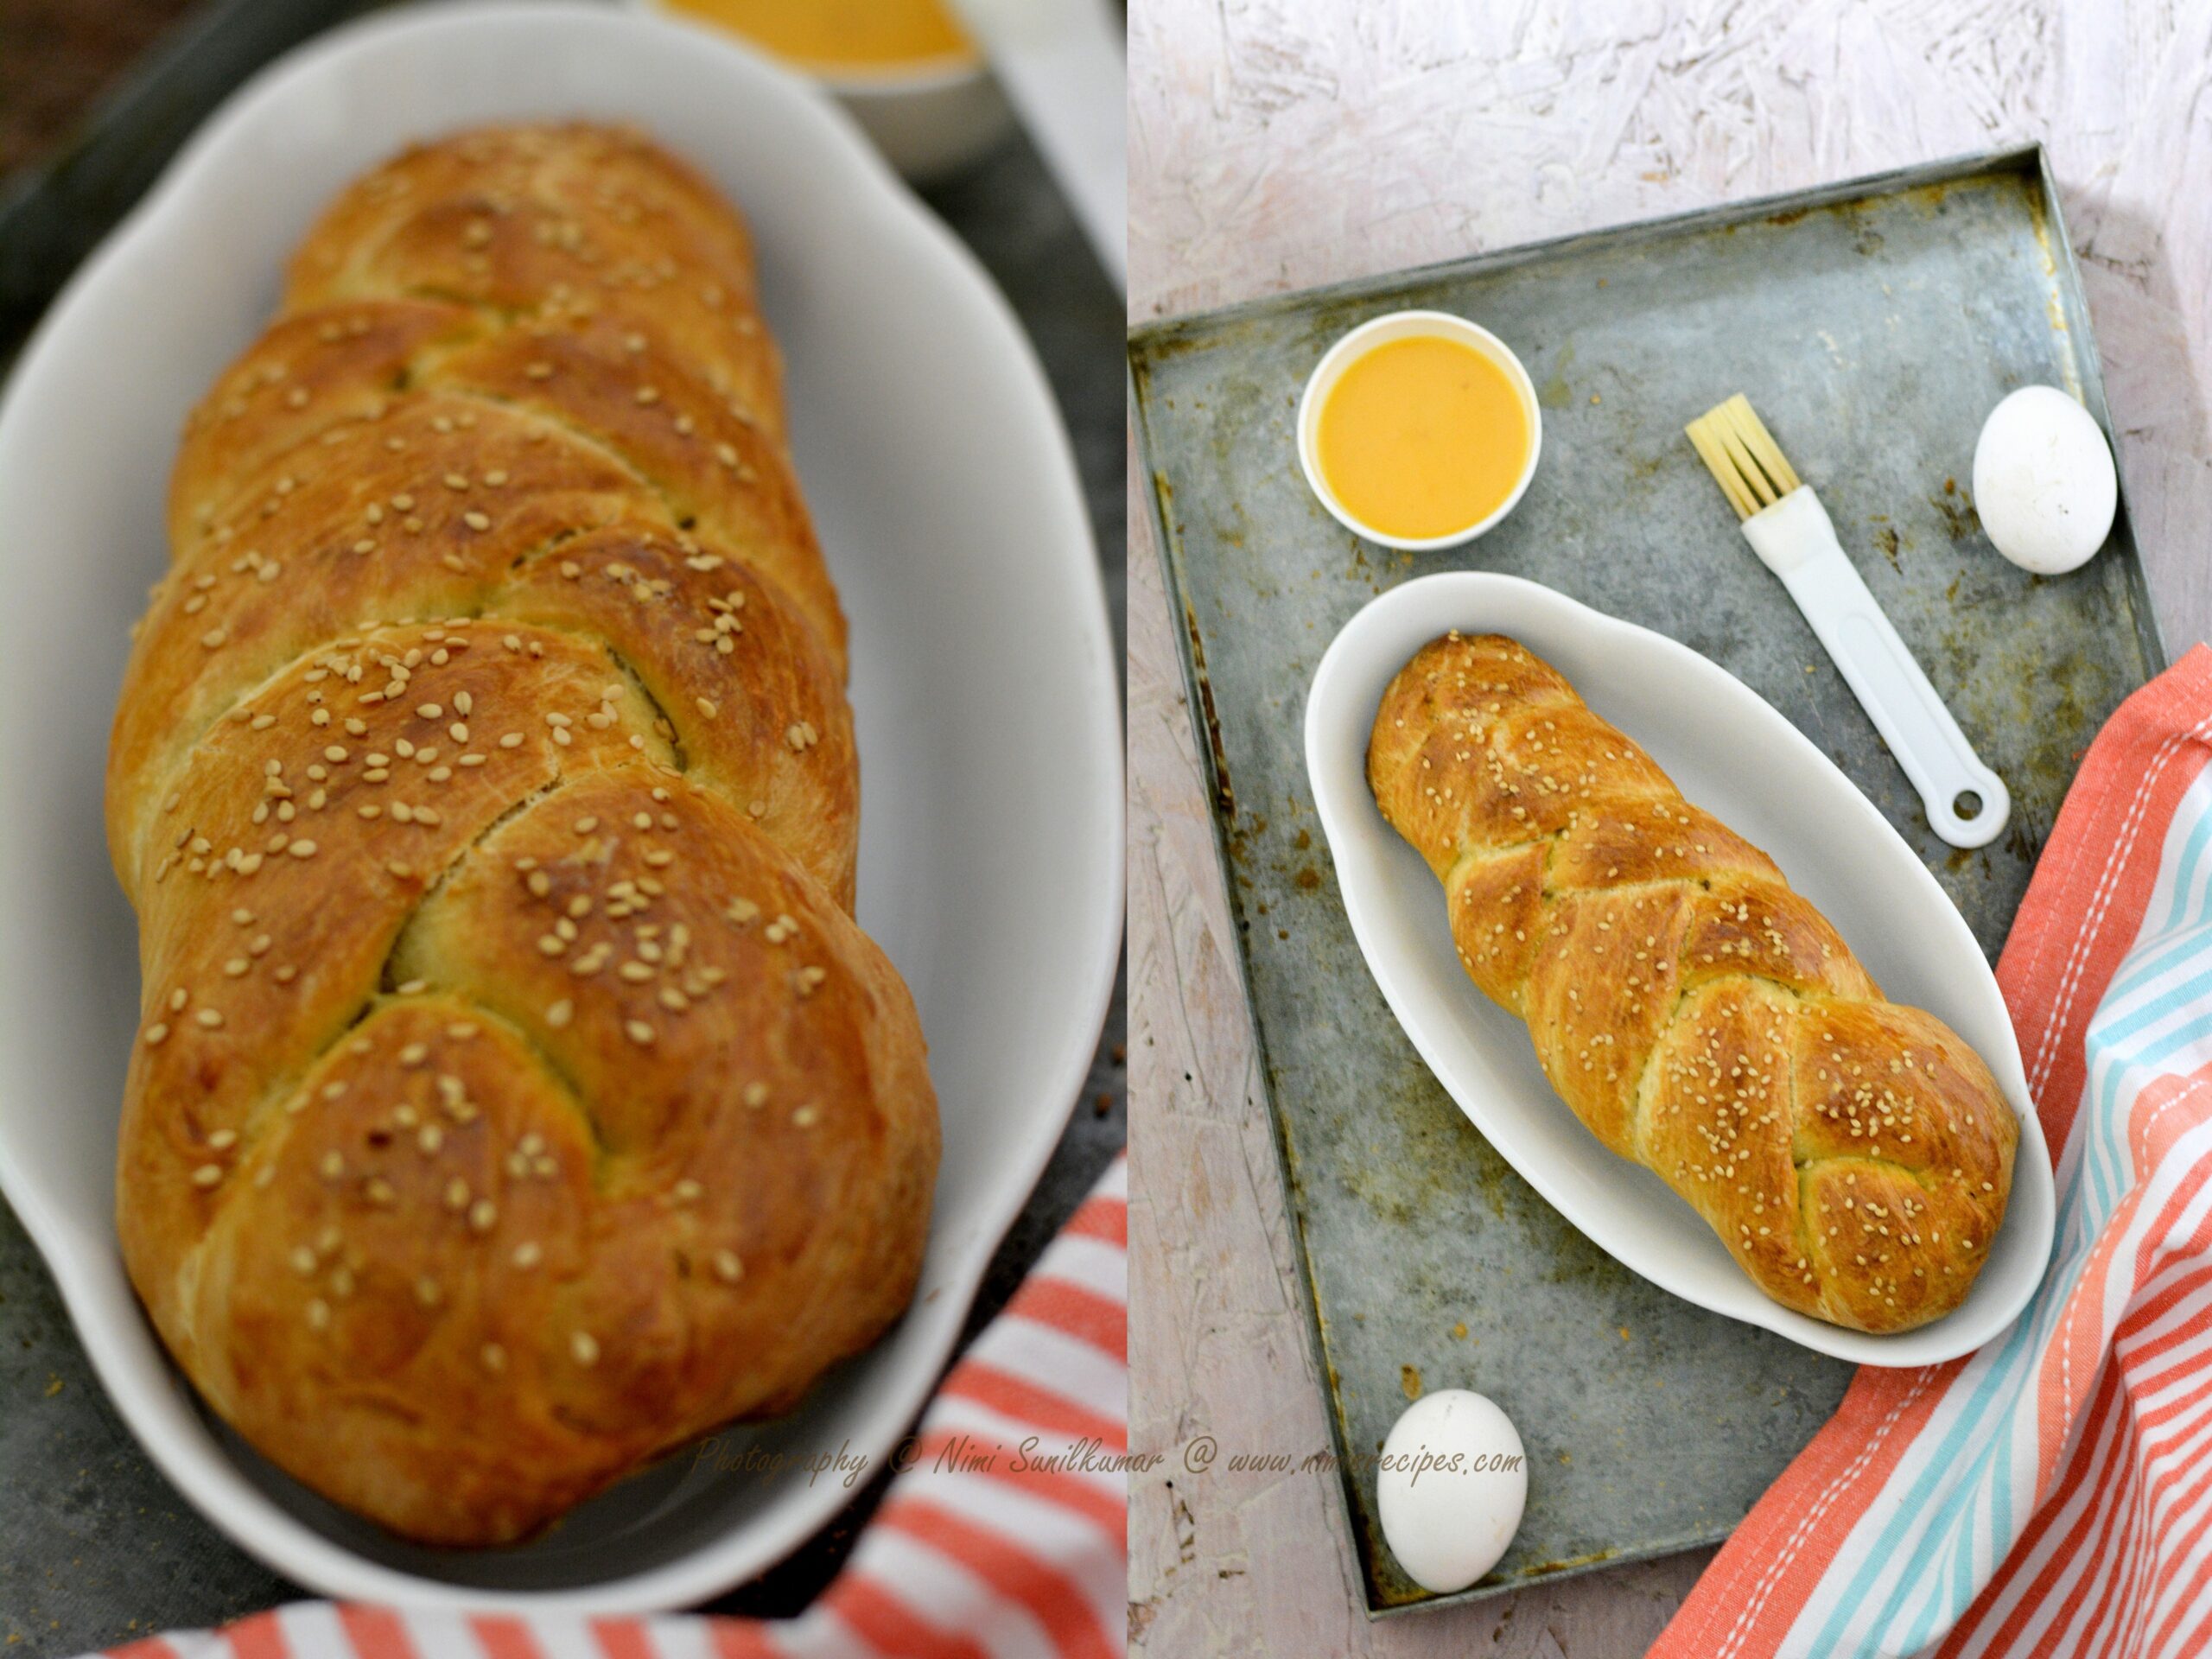
Baking Challah bread..
Hoping all of you are at home and safe with your loved ones. At times like these, we must unite in our fight against Covid_19 and maintain social distancing….take up these moments to spend more time with your family. I am back to my blogging after a pretty long gap. Things have moved on in the past few months. We might be locked up in our homes but there’s no harm in utilizing these days to strengthen up bonds. Here’s a bread that I had baked today for my family. I am so thankful to Orly Ziv for her wonderful recipe from her award-winning cookbook. We met each other at the Gourmand Cookbook Awards in 2014 and have been friends since then.
320g water

A homemaker who fell head over heels in love with food -an award-winning cookbook author, food blogger, award-winning culinary demonstrator
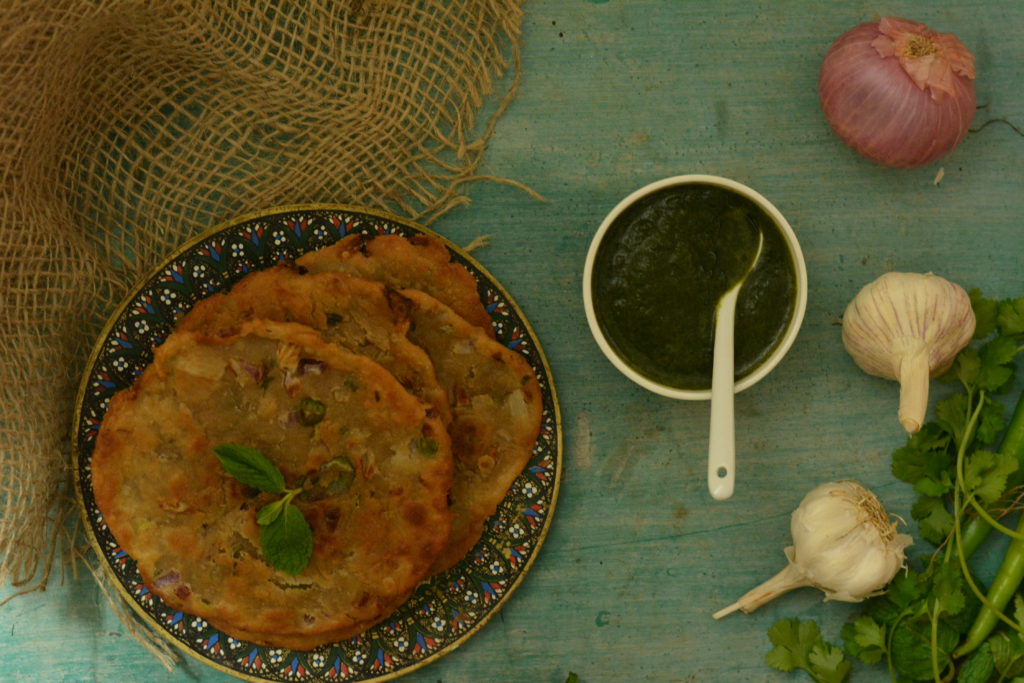
Koki- The Sindhi bread & my food journey !!
India being a country with remarkable diversity has always been the abode to a rich culinary heritage .As a child I always fancied our motherland not sure if it was of me being born and brought up outside India . The vacations were always days that I would wait for our trips to India . Indian cuisine in itself is so vast that you can never get tired exploring .The huge regional diversities from states , to borders to homes is just unbelievable .
With this new post I would also like to share the officially launch my you tube channel “Nimi’s Recipes “.This is an attempt to give a breath of life to some of the recipes that I have loved trying ..Hoping to have your support !!
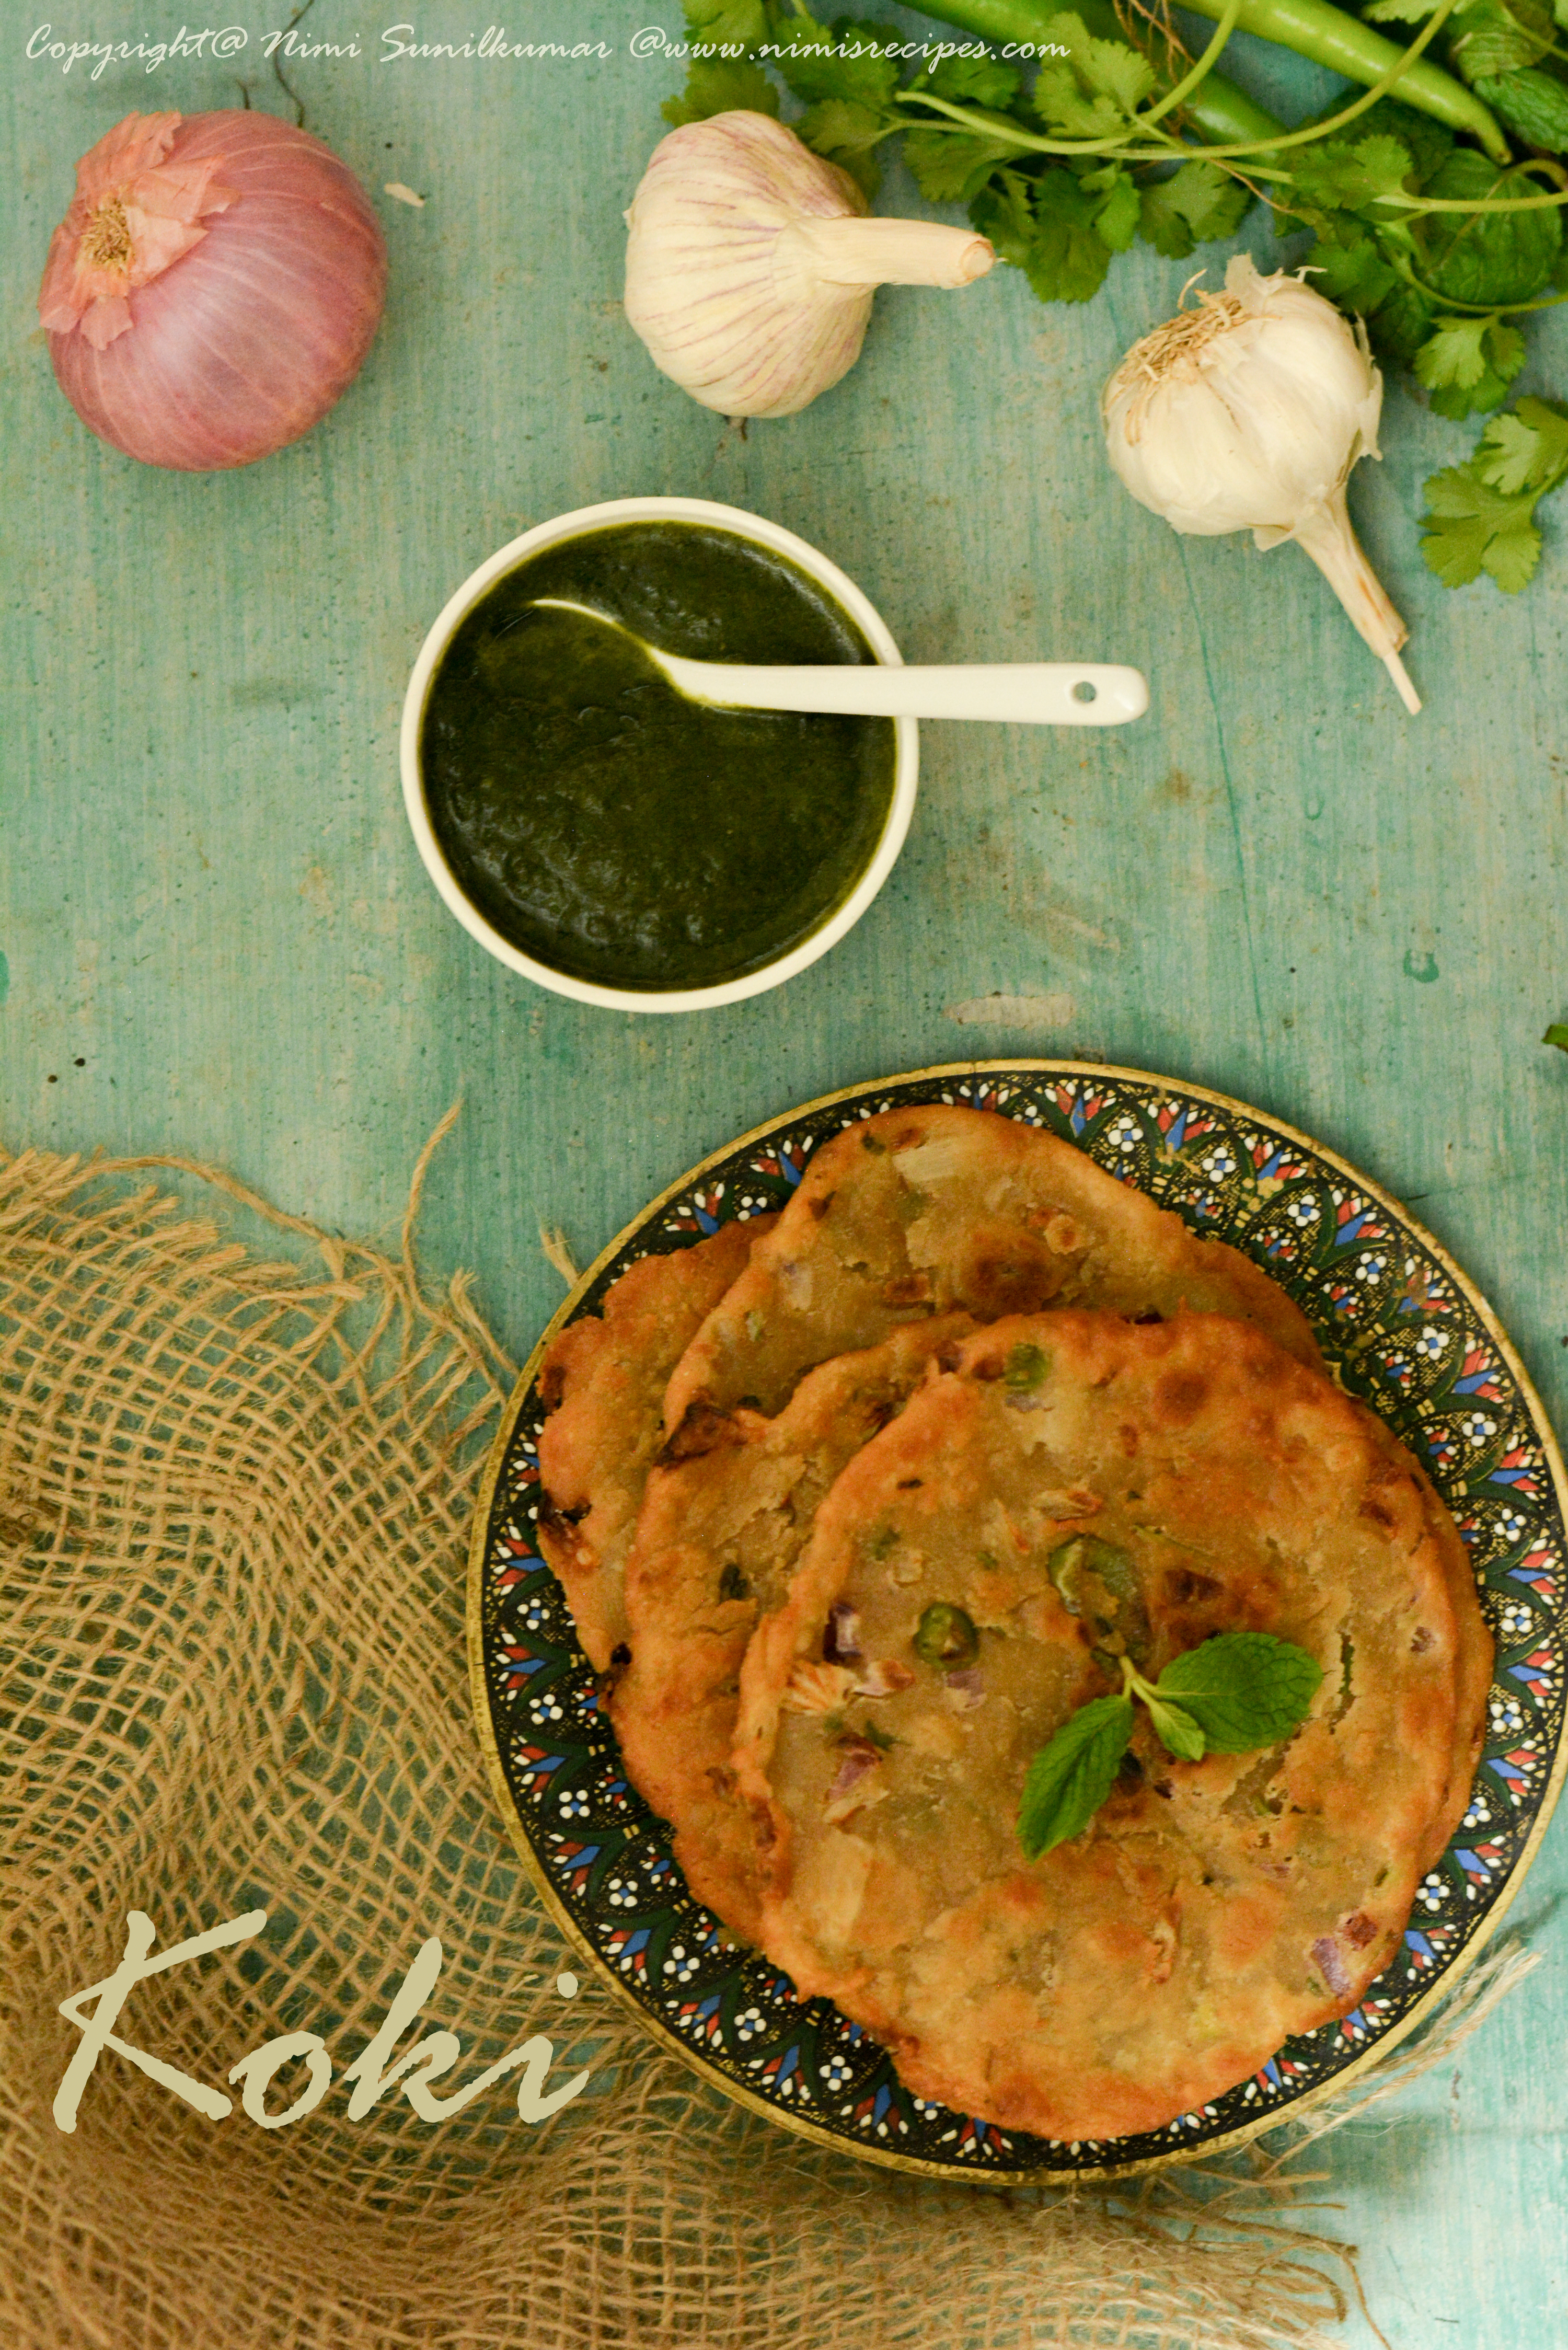
The recipe that I wanted to introduce today is a Sindhi bread -“Koki”. This Sindhi breakfast is a really good combination with green chutney .
- 4 cups whole wheat flour
- 2 large onions chopped
- 4 green chilies chopped
- 3 tbsp fresh coriander leaves finely chopped
- 2 tsps cumin seeds
- 2 tsps pomegranate seeds
- Salt to taste
- Oil for shallow frying
- In a bowl mix all ingredients except for oil and add water to knead it into a firm dough .Cover the bwl and set aside for about 10-15 minutes .
- Divide the prepared dough into small balls and shape into thick flat patty .Place patties on a warm griddle and roast both sides on a very low heat .Roll these patties into slightly thick round discs and shallow fry in oil , turning to cook both sides.Serve the koki roti with green chutney .
A homemaker who fell head over heels in love with food -an award-winning cookbook author, food blogger, award-winning culinary demonstrator
Crispy crunchy Pakwan with Dal !

It’s strange how you meet up with new people every day in your life .There are moments when you feel that you are at the verge of existence but its inspiring how a total stranger can create a new character in your life …Its a similar kind of experience that I had travelling for the research of my new books.Its pretty much amazing to see that there are people in the villages who love what they do in their life despite facing day to day crisis.
Dal pakwan has always been one of the highlight recipes from my recipe diary .Its traditionally a very famous Sindhi breakfast .Recipes have always been a fascination and their collections a hobby .May be I might have got that from my mother .During school days I fancied clipping out all the recipes that had fancy photos.Its crazy how I used to stick them up in a diary and try to try them out on weekends.My kids are the ones who have taken up those crazes now all they would love to do on a holiday is to cook something of their own .I guess I have two budding foodies all set to conquer my kitchen …

- 1/2 cup of chana dal /chick pea lentils soaked for 30 mins
- 1/2 tsp of turmeric powder
- 1tbsp of oil
- 1/2 tsp of dry mango powder
- 3-4 green chillies chopped
- 1/2 tsp of red chilli powder
- 1/2 tsp of cumin seeds
- 1 tbsp of onion finely chopped
- 1 tsp of tamarind extract
- coriander leaves
- salt to taste
- For Pakwan
- 1 cup of All purpose flour
- 1/2 tsp of cumin seeds
- 1tsp of oil
- Salt to taste
- oil for deep frying
- Wash and pressure cook the lentils with turmeric powder, water and salt to taste for about 5-6 whistles.Once cooked slightly mash the lentils with a wooden spoon . Heat oil in a wok , fry cumin seeds and green chillies .Add in chilli powder and dry mango powder .Make sure that you stir and keep it on low flame so that you are not burning the powders. Stir in the cooked lentils and turn off the flame .Garnish with chopped onions and coriander leaves.
- For the pakwans, mix salt , flour , cumin seedsin a bowl .Pour in water slowly and knead it into a dough .You can also add a teaspoon of oil to the dough to smoothen out the dough .Let the dough sit for about 10-15 minutes.Divide the dough into balls and roll each ball into discs.Prick with a fork on the rolled out dough . Heat oil in a wok and deep fry the pakwans till they are golden and crisp.
- Serve warm with dal .
A homemaker who fell head over heels in love with food -an award-winning cookbook author, food blogger, award-winning culinary demonstrator
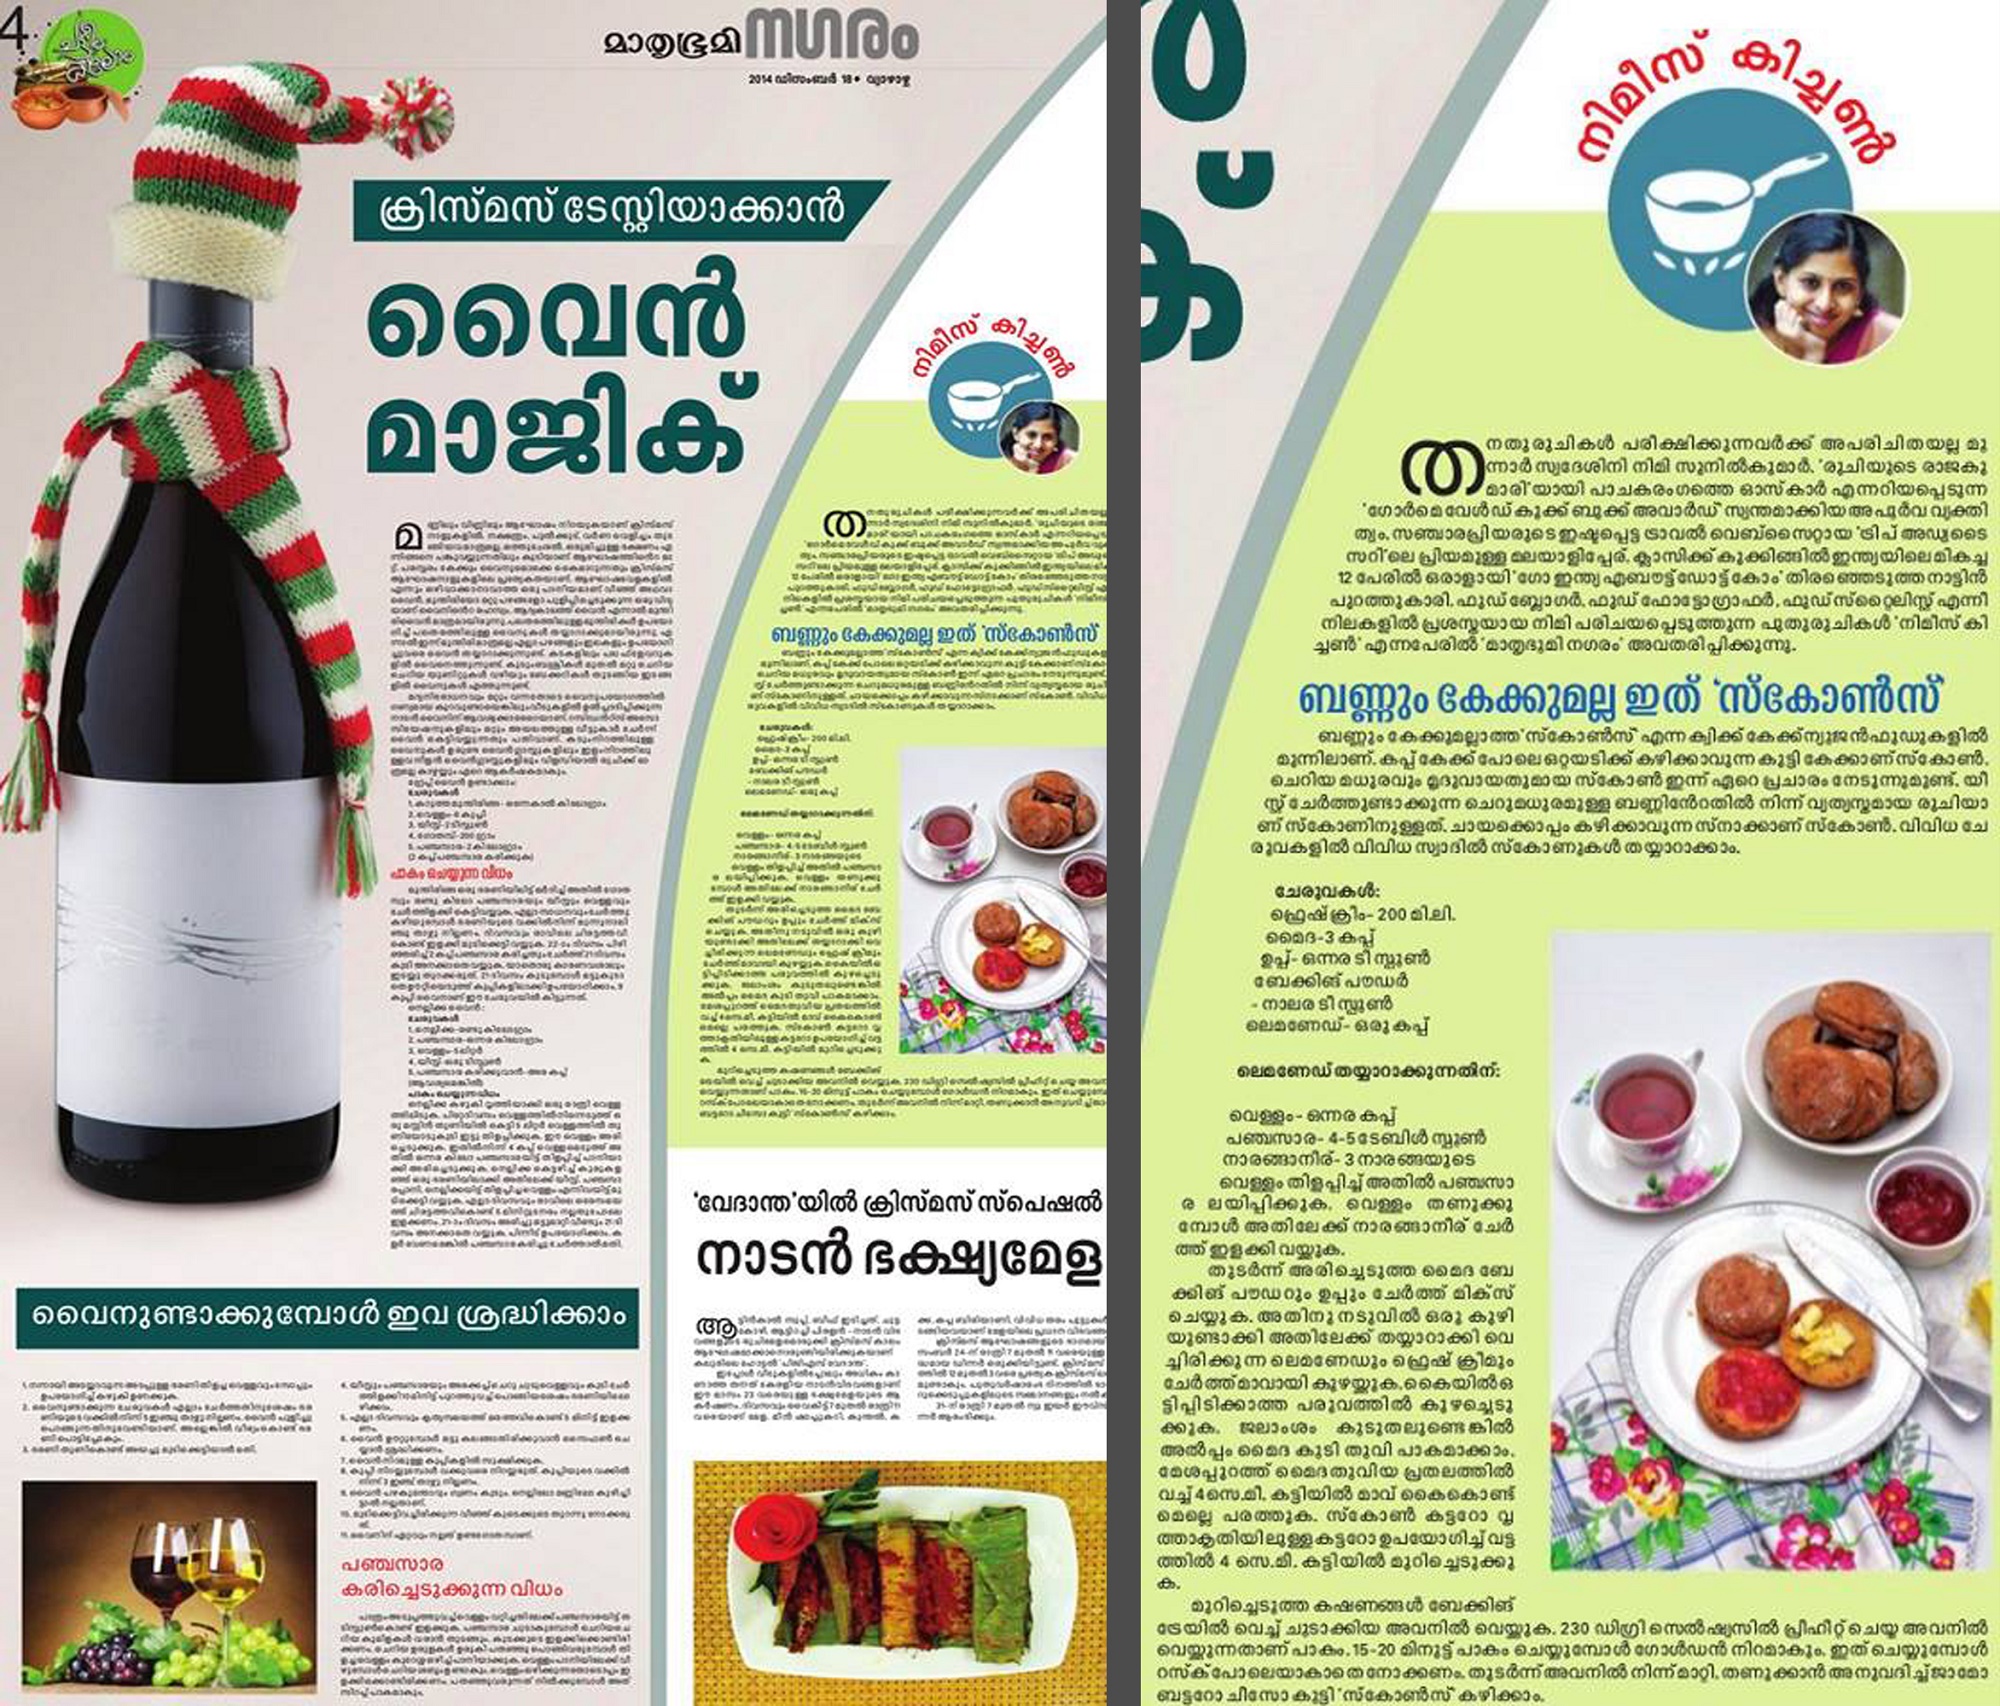
Christmas bells n Scones!!!

There’s the end of another year….. 2014 is slowly winding up..and it’s time for new resolutions !!!! .The holidays for Christmas have started ….break till the 5th of Jan 2015 when the new term is going to start off at school .My elder one Surji is off enjoying his break with his cousins at his father’s house and Siva with me my nonstop blabbering companion. It’s better to hear that my health is catching up from last week’s review at the doc..but the craziest thing is when everyone who meet up with me after a few days have been asking me , ”Oh Nimi u seem to be enjoying your break from school ..You have put on weight!!!” Ha! And the actual truth I feel quite bloated up and tired …an effect from the medications. A worried me asks my doc once in a while ..if I would become my actual self ..She smiles and says ….”all will be well once the course is completed!!”Hmm ….Hope for the best ! So before I get too lazy and sleepy in writing this post ..let me hop on to the recipe of Scones…and thank u Sylvia….here’s picking out and trying recipes from your book 😉
Scone is a single serving cake or quick bread. They are often lightly sweetened and are occasionally glazed. These are different from the normal sweet buns which are normally made from yeast. There are different types of scones and the variants differ from the places .In some countries they also have the savory scones. Scones are normally served with tea or coffee.


- 200ml fresh cream
- 3 cups of flour
- 1 ½ tsp salt
- 4 ½ tsp of baking powder
- 1 cup lemonade
- Flour for dusting
- For Lemonade
- 1 ½ cup of water
- 4-5 tbsp of sugar
- Juice of 3 lemons
- To make the lemonade first boil water, stir in sugar till it dissolves well and then
- remove from heat.
- Let the syrup cool and mix in the lemon juice and keep aside.
- Sift the flour, baking powder and salt twice into a bowl.
- Make a well in the center and pour in the lemonade and cream.
- Use wooden spoon and slightly fold in to make slightly sticky dough.
- Dust flour on your counter; roll the dough slightly mixing the dough to keep it from
- sticking.
- Pat out the dough about 4cm thick with your hands, sprinkling flour when kneaded.
- Use a scone cutter or a circle shaped cutter to cut out circles.
- Place these shapes on to a baking tray and leave them to rise for about 10 minutes.
- Preheat oven to 230 degree Celsius and bake these scones for about 15-20 minutes
- or until they are golden in colour.
- Eat them warm /cold topped with jam, butter or cheese.
So Wishing all a very Merry Christmas!!!

A homemaker who fell head over heels in love with food -an award-winning cookbook author, food blogger, award-winning culinary demonstrator
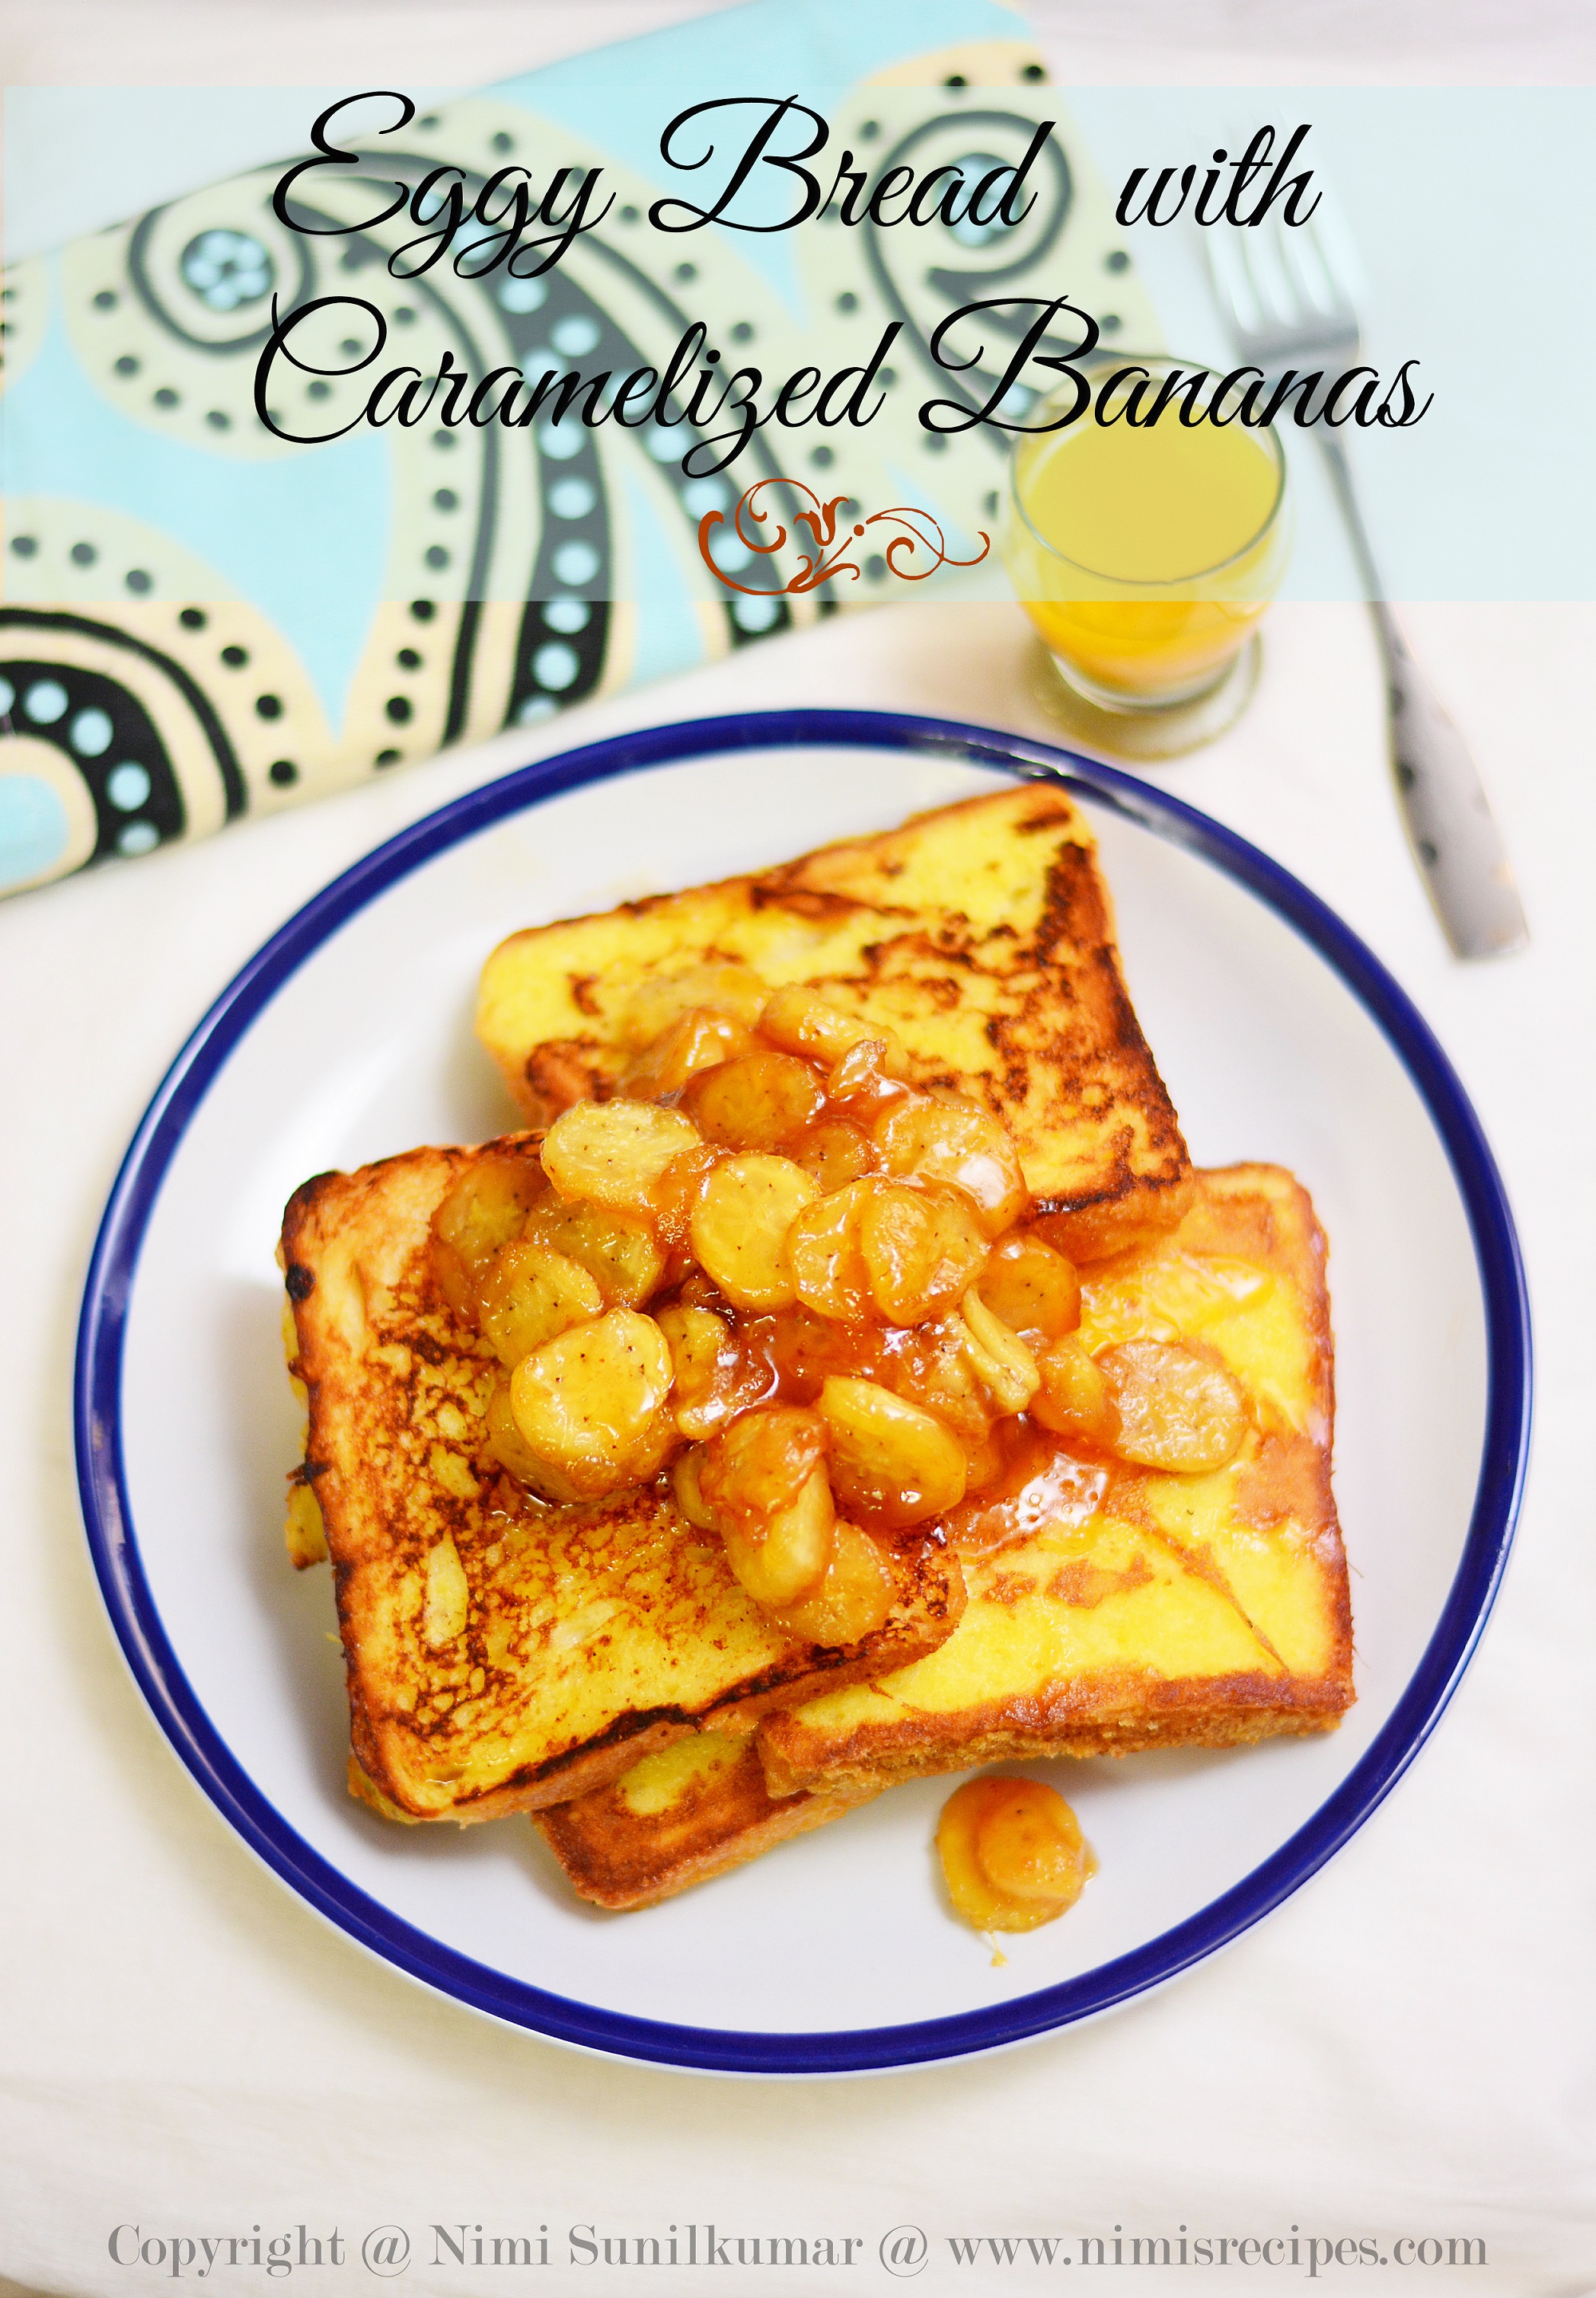
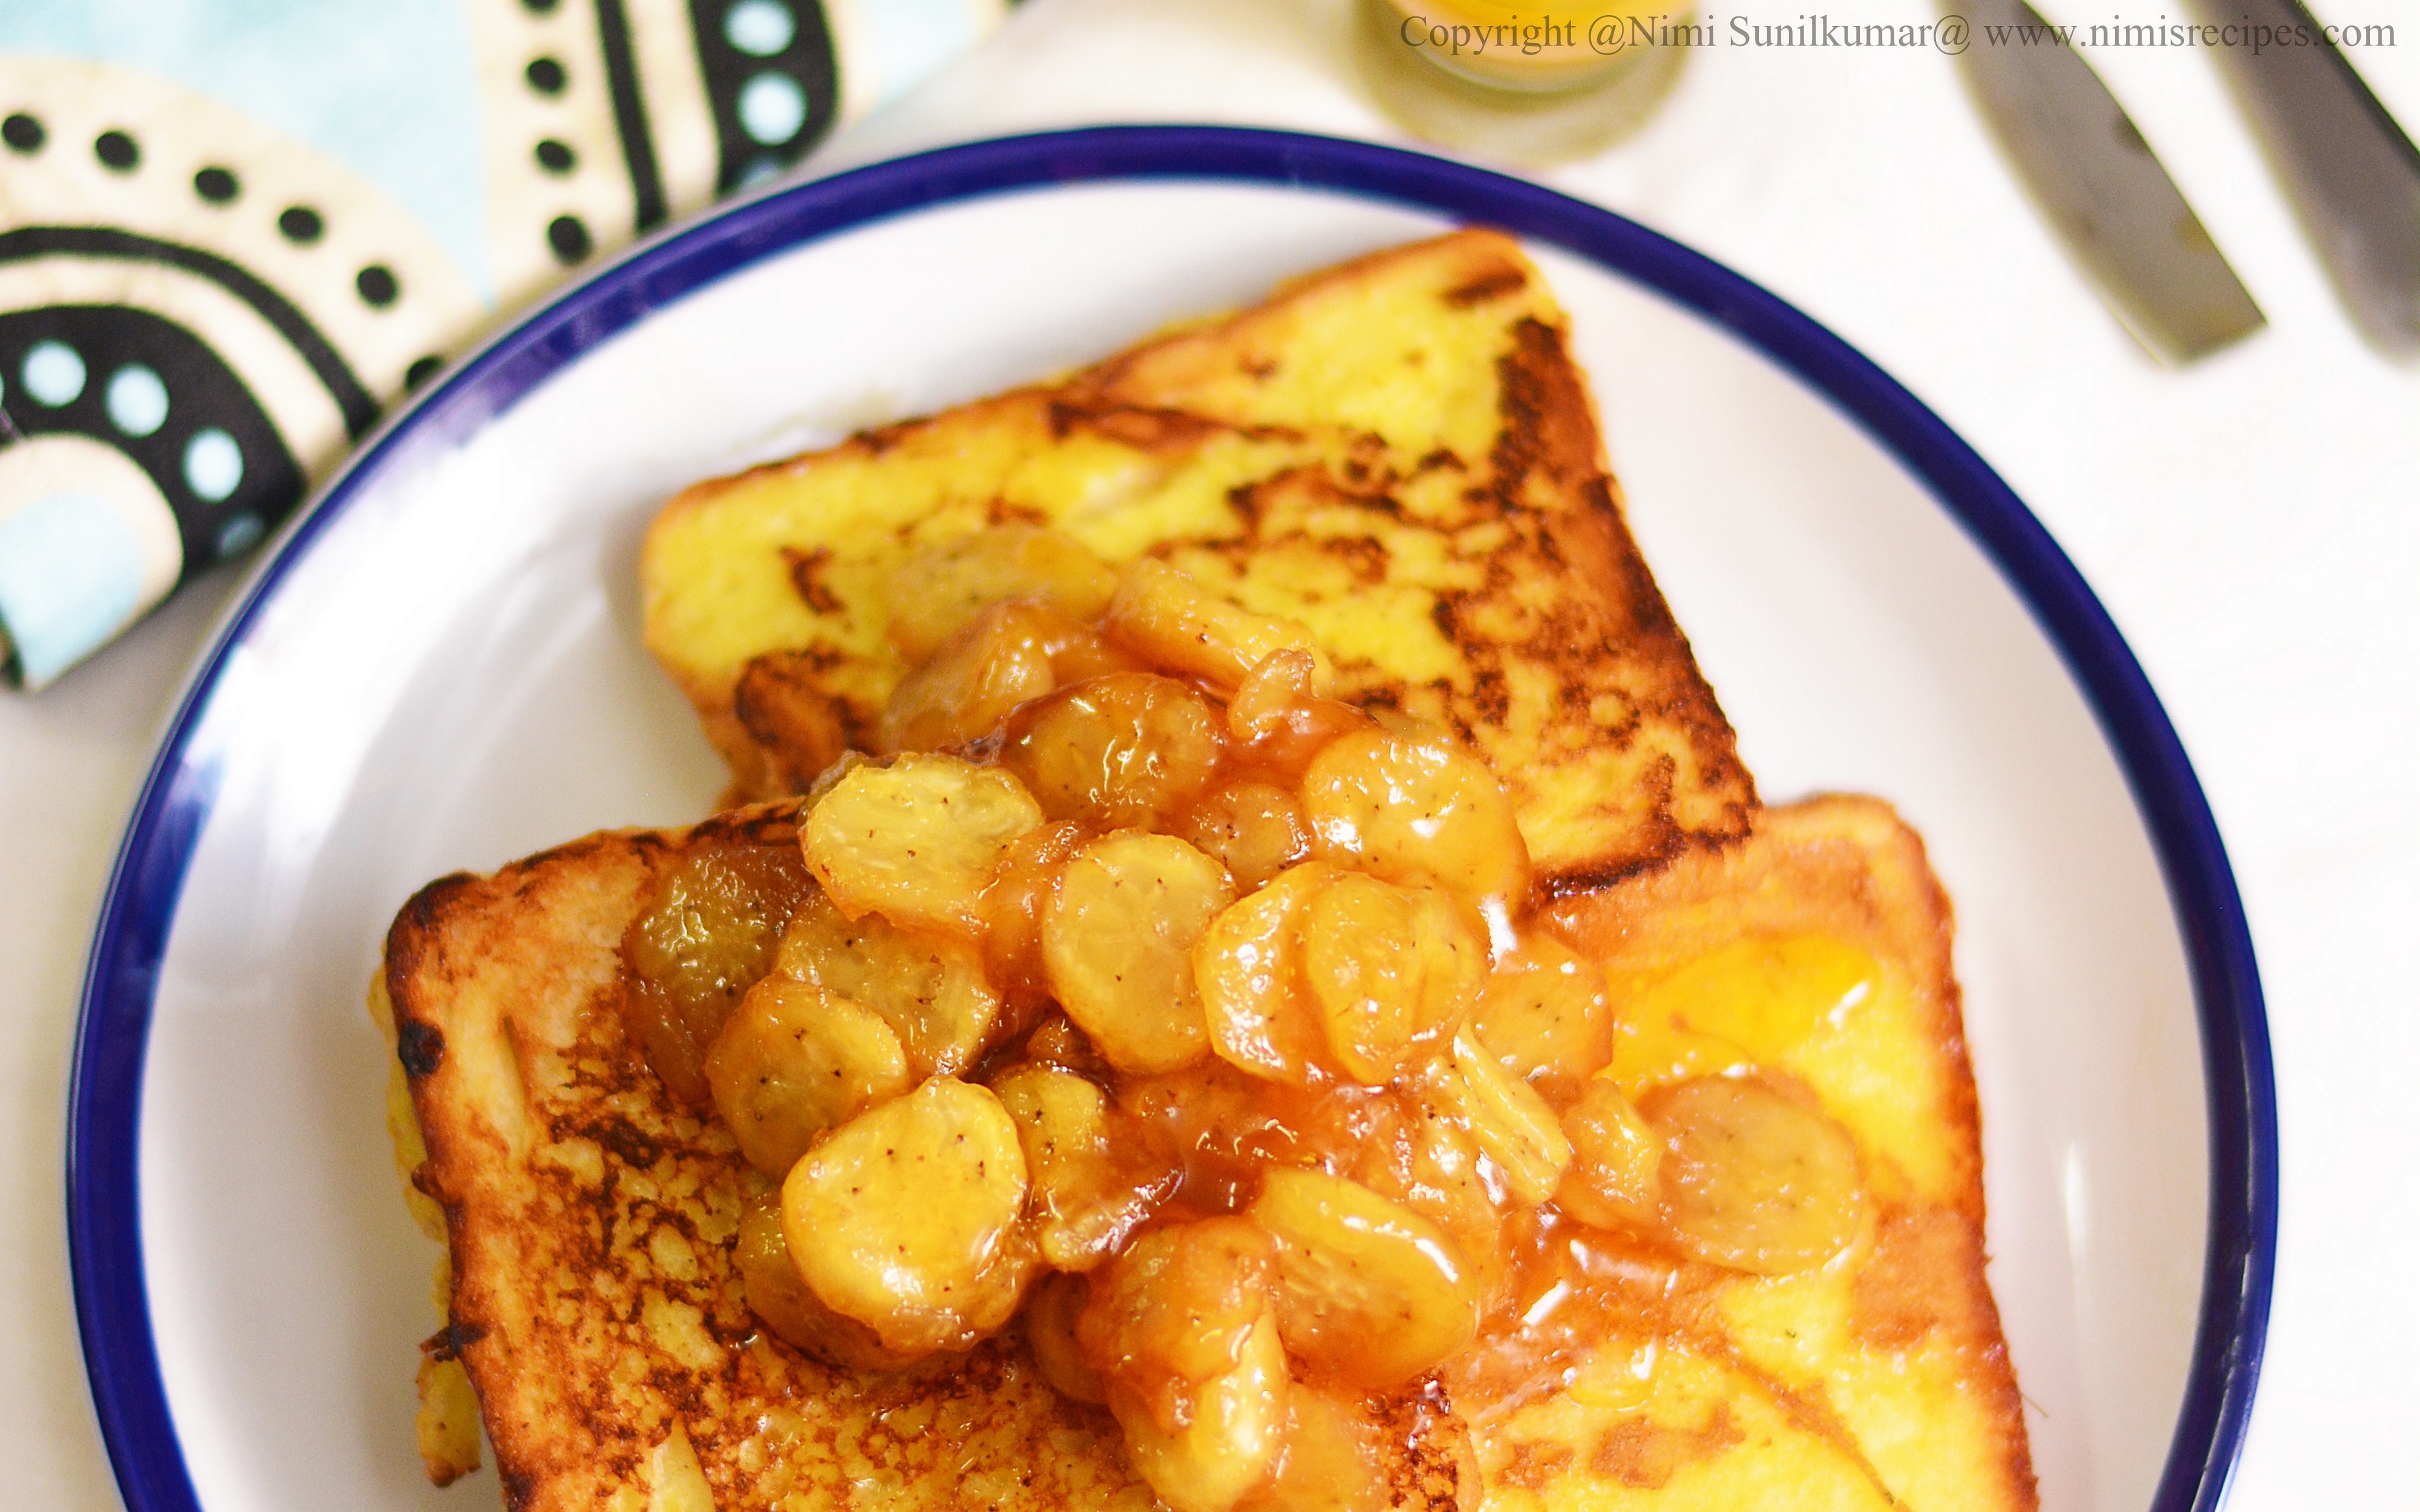
An Eggy toast celebrating.. Women’s Day!
Let me start off with wishing all the wonderful women out there a Happy Women’s Day!
My sole pillar of strength and the woman who I adore the most in my life is my mom.She hasbeen there for me to look on to ,advice, love , scold..solving out ..having the patience to hear my stories(which never end..:P)..The life of a woman is indeed no cakewalk..phew! I wanted to pick up a real eezy peezy recipe to post on Womens day… ..it was then that I stumbled on to these Eggy breads while I was watching one of Gordon Ramsays cooking spree on TV.He had mentioned that it was one of his moms special recipes…so why not post a recipe of a wonderful mom celebrating Womanhood 🙂
- 4 eggs
- 2 tbsp of milk
- 2 tbsp of sugar
- 4 thick slices of slightly stale bread
- 1/2 tsp of cinnamon powder
- Butter/oil for frying
- For Caramelized Bananas
- 3 firm but ripe bananas
- 2 Tbsp of unsalted butter
- 3 Tbsp of sugar
- 1/2 tsp of orange juice
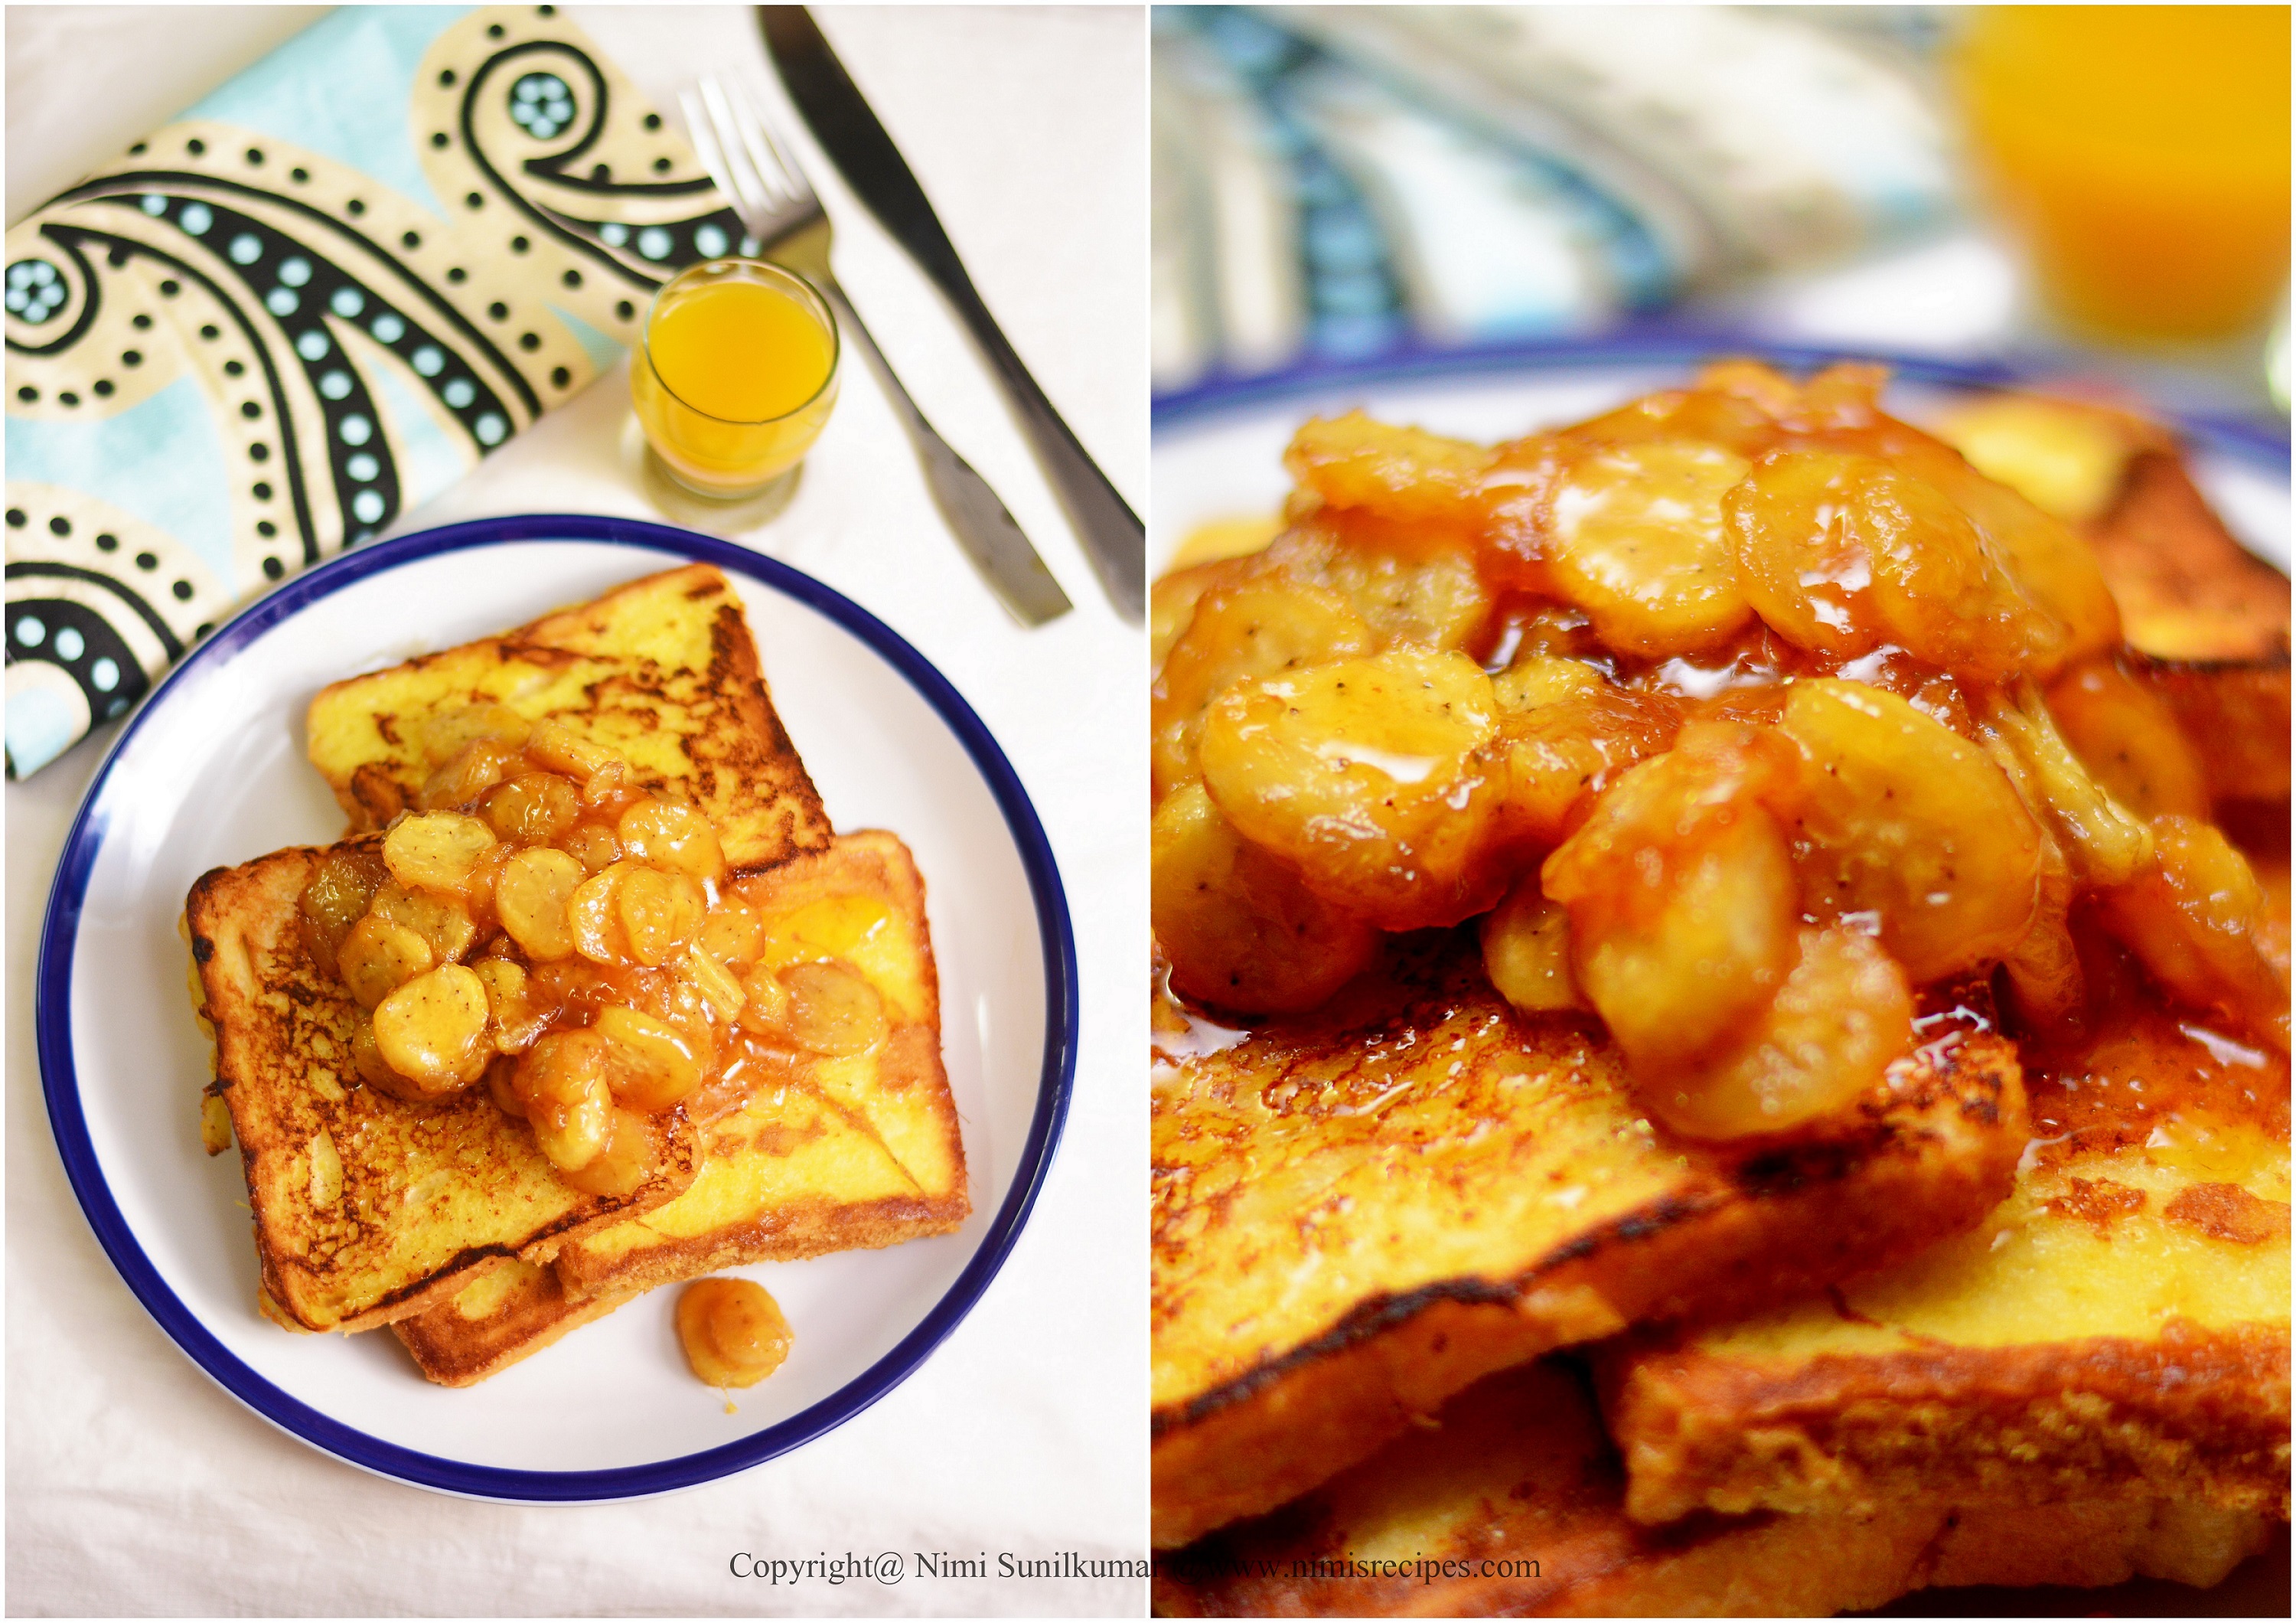
- Beat the eggs together thoroughly with the milk and 1 tablespoon of the sugar, and
- then pour into a shallow dish.
- Add the bread slices and submerge them in the egg, turning to coat them well.
- Fry the both sides of the bread till golden brown, drizzling ghee or oil on the sides.
- Separate on to a dish.
- Peel the bananas and slice.
- In a large fry pan over medium-high heat, melt the butter.
- Add the banana slices and cook, gently turning them occasionally, until they begin to
- brown, 2 to 3 minutes.
- Sprinkle in the sugar and cook until it melts, about 1 minute.
- Gently stir in the 1/2 cup orange juice and the rum and cook until the liquid has
- reduced slightly, about 1 minute.
- If the sauce seems too thick, add a little more orange juice until it is the desired
- consistency.
- Top the eggy bread with the caramelized bananas….

Planning to have a glass of juice with your eggy bread?
I had my eggy toasts with a glass of Paperboat’s Aamras.Paper boat drinks boast on reliving the old memmories through their drinks.To say the truth , when I received my set of paperboat drinks …the packs where quite inviting in their colors and flavors.Being a mango lover my first choice was to try out Aamras .I was not quite dissappointed with my sip of Aamras ..boing …felt as if I had a slice of juicy piece of a super ripe mango ..yumm! Paperboat has some unique flavors of which they stand apart from other drinks.The flavors that I got to try out were Aamras, Aampanna , Jaljeera & Jamun .Aampanna did have that tangy sourness with the shot of cumin .Wasn’t quite fascinated by the tastes of Jal jeera and Jamun .The color of Jamun was quite appealing but my tastebuds couldn’t quite cope with the taste of it. My vote would aamras and aampanna when compared to the other two.Its a good innovation though that Paperboat has bought out some very unique tastes 🙂

A homemaker who fell head over heels in love with food -an award-winning cookbook author, food blogger, award-winning culinary demonstrator
Love Nutella…??? Get ready for ..Nutella Twists!!!

This weeks post is a special dedication to all those who love Nutella 😀 When I saw that the Nutella twists was the recipe chosen for last months Daring Bakers was thoroughly fascinated by this twisted beauty.Although it took off a few hours of my Saturday ..it was total bliss ..YuMM! 😀 The best part was having my sons ready to help me out in baking .My younger one was more keen in knowing if it was ready .Every five minutes he would be testing my patience ..asking if it was ready .He wanted to help me out in spreading out the Nutella on the layers…and guess what ….he had nutella all over his face.When I stared at him ..he gave me his angelic smile ..showing of his teeth all coated in chocolate..:PKids are kids ..hmm 😀

Nutella Twists
1 can (400 gm) (14 oz) sweetened condensed milk
3 large eggs
1 cup (240 ml) vegetable oil
1 cup (240 ml) warm water
3 teaspoons (15 ml) (12 gm) yeast
7 cups (1 kg) (2.2 lbs) all-purpose (plain) flour, approximately
Pinch of salt
Instead of the eggwash use
2 tablespoons (30 ml) (25 gm) (1 oz) milk powder
3 tablespoons (45 ml) lukewarm water
1teaspoon (5 ml) (5 gm) sugar
1/4 teaspoon (1 gm) instant coffee
For the filling
½ jar (200 gm) (7 oz) of nutella (or similar)
Mix the condensed milk, yeast, oil, water, and eggs in the bowl of your mixer .Add the flour one cup at a time and knead using the kneading attachment or by hand till you get a
soft dough . The dough will be slightly sticky due to the sweetened condensed milk, don’t worry once the dough rests it will have a wonderful consistency .Place the dough in a lightly oiled bowl, cover and allow to rest till it doubles in size . Punch down the dough and divide it into 2 parts. Wrap one part in a plastic bag and work with the other. Divide the dough ball into 4 parts.Roll each part into a circle at least 20 cm (8 inch) in diameter.You can use a plate or any other round item as a template if you want your layers to be identical and uniform.Spread the Nutella (or similar filling) on the first layer.9. Place the second layer on top of the first and repeat . Top with the fourth layer, this time only brush it with butter. Using a knife make cuts that divide the dough circles into 8 triangles starting at the center but don’t go all the way to the outer edge. I find that using a ruler to mark the dough makes the cuts easier and more uniform. Then divide each triangle into two (2) . That gives you a total of 16 triangles.13. Gently lift the triangles one at a time and twist them.The end result will look like this, repeat for the other dough ball. Brush the dough with egg wash replacement . Allow to rest for 15 minutes during which you would heat your oven to very hot 500°F/240°C/gas mark 9 (rack in the middle) . Bake for 5 minutes on very hot 500°F/240°C/gas mark 9, then lower the temperature to moderately hot 400°F/200°C/gas mark 6 and bake for 15-20 more minutes (ovens do differ greatly, so the time may differ… what you want is to bake it until the under side is golden brown).If you have a broiler (grill) in your oven. Turn on the broiler (grill) for a couple of minutes until the bread is golden on the top.I baked a few nutella filled buns too with my excess dough.

So wishing all a happy baking :)!

A homemaker who fell head over heels in love with food -an award-winning cookbook author, food blogger, award-winning culinary demonstrator
A .com munching on Empanadas ;)!

I have been working on posting on my .com for the past days.This post for basically to be put up on my blog but it lagged from all the way from September to November.As its said that ‘better late than never’..heres my post on Emapanada Gallegas.
Empanada is a basically stuffed bread that’ s been baked or fried out .The roots of Empanadas lie in Spain & Portugal…though there are many variations in many countries.This post is dedicated to the DB challenge for September.Thanks to Patri for the awesome recipe.:)

Empanada Gallega
For the crust:
Ingredients
5-1/3 cups bread flour
2 cups of lukewarm water (about 85°F/30ºC), approximately
1 tablespoon fresh yeast
2 teaspoons salt
4 tablespoons oil
1 large egg, for egg wash
Sift the flour into a big bowl and make a well in the middle. Rub the yeast in with your fingers.In a small bowl, mix the water and the salt.Now, using your fingers or a wooden spoon, start adding the water and mixing it with the flour-yeast mixture. Keep on working with your fingers or spoon until you have added enough water and all the flour has been incorporated and you have a messy ball of dough.On a clean counter top, knead the dough for approximately 10 minutes.Clean and oil the big bowl you used for mixing and place the kneaded dough in it. Cover it with a napkin or piece of linen and keep it in a warm, drought-free place for approximately 40 to 50 minutes.Once risen, turn the dough back into a floured counter and cut it in half. Cover one half with the napkin to prevent drying.Spread the other half of the dough using a rolling pin. You can use a piece of wax paper over the counter, it will make it easier to move the dough around. Depending on the shape of your oven pan or cookie sheet, you will make a rectangle or a round.Now, the thinness of the dough will depend on your choice of filling and how much bread you like in every bite. For your first time, make it about 3mm thin (about 1/10th of an inch) and then adjust from that in the next ones you make.

For the filling:
3 medium sized Onions chopped
1 tbsp of ginger & Garlic chopped
5 green chillies finely chopped
2 cup of cooked shredded chicken
1/2 tsp turmeric powder
2 tsps of black pepper powder
1 tsp garam masala powder
curry leaves chopped
coriander leaves chopped
In a pan pour about 2 tbsps of oil,saute the ginger & garlic with the chopped onions till translucent.Add in the green chillies,and stir for a few minutes.Now add in the powders& chicken .drizzle oil on the sides of the pan stir fry the chicken mix with salt.Add 1/2 tsp of garam masala, coriander & curry leaves before turning of the flame.

Assembling
If you haven’t used wax paper, either lightly flour or line with wax paper your pan or tray.Cover the base and sides with the dough. Using the rolling pin or a knife, cut the extra dough.Place the filling, making sure it is cold and that all the base is covered. Using a hot filling will make the bottom layer of the empanada become soggy. Be careful to avoid adding too much oil from the filling, try to make it as “dry” as possible.Start preheating your oven to moderate 350°F/180ºC/gas mark 4.Take the other half of the dough and spread it out to the same or less thinness of the base. You can use a piece of wax paper for this too. Take into account that this “top” dough needs to be smaller around than the bottom, as it only needs to cover the filling.If not using wax paper, move carefully the top to cover the filling. If using wax paper, transfer the dough, turn upside down, cover the filling and gently peel off the wax paper.Using your fingers, join bottom and top dough, when you have gone all the way around, start pinching top and bottom together with your thumb and index finger and turning them half way in, that way you end up with a rope-like border.When you are finished, make a 1 inch hole in the middle of the top layer. This will help hot air exit the empanada while it’s baking without breaking the cover.Using a fork, prick the top layer or, using scissors, make snips that go all the way through the top layer.In a small bowl, beat an egg and add a tbsp of cold water. With the pastry brush, paint the top of the empanada with the egg wash. Place the empanada in the oven and bake for about 45 minutes. Check that the bottom part is done.

I made different shapes of empanadas..and loved simply baking them..Hope u too enjoy this Empanada Ride!

A homemaker who fell head over heels in love with food -an award-winning cookbook author, food blogger, award-winning culinary demonstrator
A Birthday note Buttered with Badami Chicken and Puffy Baturas!

This year’s birthday was a very very special one to me with my best buddies.Thank u guys for all your sweet wishes through FB.Luv u my TMS pals for giving me a special birthday wish and as part of the b’day I had no idea of making a cake and that too for my bday..the main thing was that I was damn lazy.If it was not for my friend Dhans I wouldn’t have ever made one:P

It was a total dillemma on who’s going to cut the cake with the cake almost done.Both my kiddos were on to cutting the cake and at last the three muskeeters were cutting the cake singing in chorous “Happy Birthday to you Amma!”….and I was clickin all this:D
What better way could I have my birthday celebrated!:D

Baturas the puffed yoghurt bread is one of my favs and when you have Badami chicken to accompany it the taste really gets richy rich.

Batura/Puffed Indian yoghurt bread
2 cups of all purpose flour
4 tbsp yoghurt
1tsp salt
1tsp sugar
1tsp yeast
3tsp of ghee
1 egg whisked
Oil for frying
In a bowl measure in the flour and making a well in the center,add in all the ingridients and mix well to make a soft dough.You can add up to 1/4 cup of water if you feel the ingridients dont come together.Let the dough rest for about 2 hrs covered,so that it gets doubled.Punch and knead the dough into balls and roll them out in to discs of about 5inch with a rolling pin.Heat oil in a kadai and fry these flat breads till puffy and golden on both sides.

Badam Chicken/Almond Chicken
1/2 kg chicken pieces
1 cup large onion sliced
2 tsp of ginger garlic paste
1/2cup of yoghurt
1/2 tsp turmeric powder
3 tsp chilli powder
3 cloves
2 cardamom
1 piece of cinnamon
1tsp sugar
10-15 almonds soaked and ground into fine paste
3/4 cup of tomato paste
2 tsps of chopped cilantro
salt to taste
Marinate the chicken pieces with yoghurt ,turmeric powder and salt keeping it for about an hour.Heat about 4tsps of oil in a kadai and add sugar and when it browns saute in the sliced onions till slightly brown.Transfer 1/4th of the sauted onion from the kadai and keep it aside.Add in the whole spices,ginger garlic paste,chilli powder and saute well on medium flame.Add in the tomato paste and mix well till the oil seperates.Add in the chicken pieces to the masala and stir well on high flame.Pour 2 cups of hot water and cook covered on medium flame.When the chicken is well cooked,stir in the badam paste and when the gravy thickens,garnish with chopped cilantro!
A homemaker who fell head over heels in love with food -an award-winning cookbook author, food blogger, award-winning culinary demonstrator
Buttery Croissants ..perfect with your morning Coffee!

Croissants have always fascinated me..there were times when I used to think that if I would ever be able to make them at home.This flaky buttery beauty is quite time consuming ..but you are sure to forget them in taste.Thanks to Sarah for choosing ‘Croissants ‘ for September’s DB challenge!I loved trying it and tasting it whole heartedly!


Croissants
1¼ teaspoon of dry-active yeast
3 tablespoons warm water (less than 100°F/38°C)
1 teaspoon sugar
1 3/4 cups of strong plain flour
2 teaspoons sugar
1½ teaspoon salt
½ cup milk
2 tablespoons oil
½ cup chilled, unsalted butter
1 egg, for egg wash


2. Measure out the other ingredients
3. Heat the milk until tepid (either in the microwave or a saucepan), and dissolve in the salt and remaining sugar
4. Place the flour in a large bowl.
5. Add the oil, yeast mixture, and milk mixture to the flour
6. Mix all the ingredients together using the rubber spatula, just until all the flour is incorporated
7. Turn the dough out onto a floured surface, and let it rest a minute while you wash out the bowl
8. Knead the dough eight to ten times only. It’s a little difficult to explain, but essentially involves smacking the dough on the counter (lots of fun if you are mad at someone) and removing it from the counter using the pastry scraper.
9. Place the dough back in the bowl, and place the bowl in the plastic bag
10. Leave the bowl at approximately 75°F/24°C for three hours, or until the dough has tripled in size.
12. Place the dough on a lightly floured board or countertop, and use your hands to press it out into a rectangle about 8 by 12 inches (20cm by 30cm).
13. Fold the dough rectangle in three, like a letter (fold the top third down, and then the bottom third up)
14. Place the dough letter back in the bowl, and the bowl back in the plastic bag.
15. Leave the dough to rise for another 1.5 hours, or until it has doubled in size. This second rise can be done overnight in the fridge
17. Once the dough has doubled, it’s time to incorporate the butter
18. Place the block of chilled butter on a chopping board.
19. Using the rolling pin, beat the butter down a little, till it is quite flat.
20. Use the heel of your hand to continue to spread the butter until it is smooth. You want the butter to stay cool, but spread easily.
22. Spread the dough using your hands into a rectangle about 14 by 8 inches (35 cm by 20 cm).
23. Remove the butter from the board, and place it on the top half of the dough rectangle
24. Spread the butter all across the top two-thirds of the dough rectangle, but keep it ¼ inch (6 mm) across from all the edges. Fold the top third of the dough down, and the bottom third of the dough up.
26. Turn the dough package 90 degrees, so that the top flap is to your right (like a book).
27. Roll out the dough package (gently, so you don’t push the butter out of the dough) until it is again about 14 by 8 inches (35 cm by 20 cm).
28. Again, fold the top third down and the bottom third up.
29. Wrap the dough package in plastic wrap, and place it in the fridge for 2 hours.
31. Tap the dough with the rolling pin, to deflate it a little
32. Let the dough rest for 8 to 10 minutes
33. Roll the dough package out till it is 14 by 8 inches (35 cm by 20 cm).
34. Fold in three, as before
35. Turn 90 degrees, and roll out again to 14 by 8 inches (35 cm by 20 cm).
36. Fold in three for the last time, wrap in plastic, and return the dough package to the fridge for two more hours (or overnight, with something heavy on top to stop it from rising)
38. First, lightly butter your baking sheet so that it is ready
39. Take the dough out of the fridge and let it rest for ten minutes on the lightly floured board or counter
40. Roll the dough out into a 20 by 5 inch rectangle (51 cm by 12½ cm).
41. Cut the dough into two rectangles (each 10 by 5 inches (25½ cm by 12½ cm))
42. Place one of the rectangles in the fridge, to keep the butter cold
43. Roll the second rectangle out until it is 15 by 5 inches (38 cm by 12½ cm).
44. Cut the rectangle into three squares (each 5 by 5 inches (12½ cm by 12½ cm))
45. Place two of the squares in the fridge
46. The remaining square may have shrunk up a little bit in the meantime. Roll it out again till it is nearly square
47. Cut the square diagonally into two triangles.
48. Stretch the triangle out a little, so it is not a right-angle triangle, but more of an isosceles
49. Starting at the wide end, roll the triangle up towards the point, and curve into a crescent shape.
50. Place the unbaked croissant on the baking sheet
51. Repeat the process with the remaining squares of dough, creating 12 croissants in total.
52. Leave the tray of croissants, covered lightly with plastic wrap, to rise for 1 hour
54. Mix the egg with a teaspoon of water
55. Spread the egg wash across the tops of the croissants.
56. Put the croissants in the oven for 12 to 15 minutes, until the tops are browned nicely
57. Take the croissants out of the oven, and place them on a rack to cool for 10 minutes before serving.

A homemaker who fell head over heels in love with food -an award-winning cookbook author, food blogger, award-winning culinary demonstrator
Hi! I am Nimi Sunilkumar…an award winning cookbook author /culinary demonstrator/freelance writer / food photographer/food blogger …spiced with the flavors of food..


